A Avalonia Application: Keep a label scrolling inside a list of boxes inside a ScrollViewer but within the bounds of contained item.
This post is a follow up to my previous post Scrolling Label Inside a Scrolling List – WPF / C#. Only this time let us do the same scrolling label but within an Avalonia Application. Avalonia is a cross platform UI framework for .net. You can get further information by visiting the Avalonia Home Page.
Recapping our Scrolling Label Application
Let’s say that in a Avalonia application, there is a ItemsControl inside a ScrollViewer control. The ItemsControl contains a list of boxes. In each, a centered label (TextBlock) must scroll in a particulary way within the contained box. The Scrolling Label must move to stay visible within the bounds of the containing box.
You will notice I have copied this largely from my previous post. This is because Avalonia has maintained a sameness to WPF as much as possible. There are differences, some subtle. These are enough to make Avalonia not compatible with WPF. However there is enough similarities for familiarity with WPF to be at least about 80% towards mastery of Avalonia. Familiarity with ReactiveUI and the reactive extensions (Observables) is an advantage also.
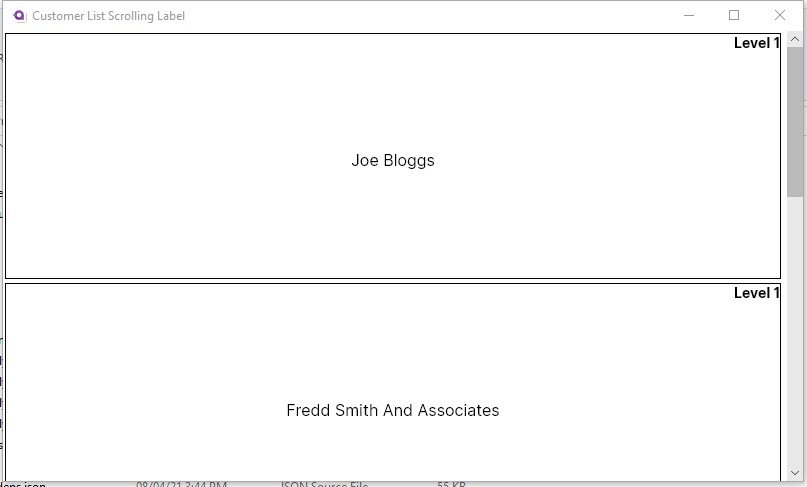
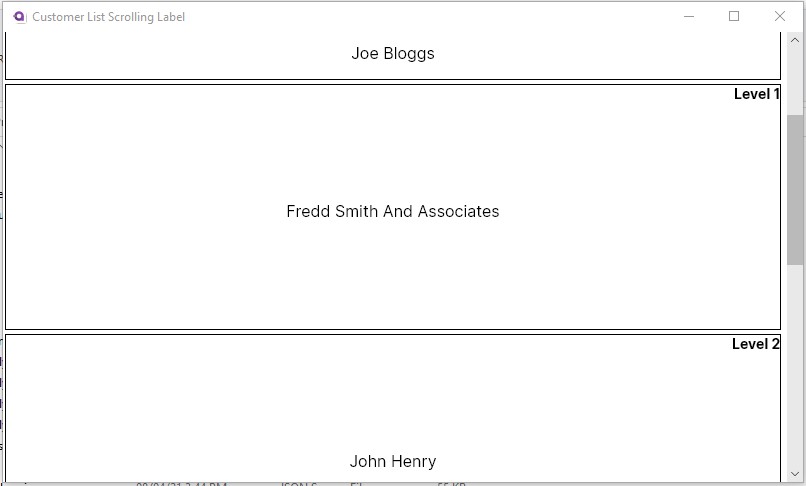
As per the previous post here is some pictures of the running application. You will notice it looks pretty close to the WPF application. You will notice the default Avalonia icon.


So Let’s Go!
In order to reuse most of our code, I separated the solution into separate projects. These is the Ava (avalonia project), core (models, view-models and services), design and WPF. Obviously in a typical application one would also have at least a core.test project as well. As mentioned in the previous post you can view the full solution code on Git-Hub.
The View Code.
If you have not read the previous post you will see the overview of the models and viewmodels etc. I am reusing those. Here, I am just going to go over the view code which has only subtle differences. First the customer view axaml (Avalonia XAML).
<rxui:ReactiveUserControl xmlns="https://github.com/avaloniaui"
             xmlns:x="http://schemas.microsoft.com/winfx/2006/xaml"
             xmlns:d="http://schemas.microsoft.com/expression/blend/2008"
             xmlns:mc="http://schemas.openxmlformats.org/markup-compatibility/2006"
             x:Class="ScrollingLabel.Views.CustomerView"
             xmlns:vm="clr-namespace:ScrollingLabel.ViewModels;assembly=ScrollingLabel.Core"
             xmlns:rxui="http://reactiveui.net"
             xmlns:designVM="clr-namespace:ScrollingLabel.Design.ViewModels;assembly=ScrollingLabel.Design"
             x:TypeArguments="vm:ICustomerListItemViewModel"
             x:DataType="vm:ICustomerListItemViewModel"
             x:CompileBindings="True"
             mc:Ignorable="d" d:DesignWidth="600" Height="250"
>
  <Design.DataContext>
    <designVM:CustomerListItemViewModelDesign/>
  </Design.DataContext>
  <Border BorderBrush="black" BorderThickness="1" Margin="2">
    <Grid>
      <Grid.RowDefinitions>
        <RowDefinition Height="Auto"/>
        <RowDefinition/>
      </Grid.RowDefinitions>
      <Grid.ColumnDefinitions>
        <ColumnDefinition Width="Auto"/>
        <ColumnDefinition/>
        <ColumnDefinition Width="Auto"/>
      </Grid.ColumnDefinitions>
      <TextBlock Text="{Binding LevelDisplay}" Grid.Row="0" Grid.Column="2"  FontWeight="Bold" />
      <TextBlock x:Name="CustomerName" Text="{Binding Name}" Grid.Row="0" Grid.RowSpan="2"   FontSize="16"  VerticalAlignment="Top" Grid.ColumnSpan="3" TextAlignment="Center"/>
    </Grid>
  </Border>
</rxui:ReactiveUserControl>
Then the customer list view.
<rxui:ReactiveUserControl xmlns="https://github.com/avaloniaui"
             xmlns:x="http://schemas.microsoft.com/winfx/2006/xaml"
             xmlns:d="http://schemas.microsoft.com/expression/blend/2008"
             xmlns:mc="http://schemas.openxmlformats.org/markup-compatibility/2006"
             mc:Ignorable="d" d:DesignWidth="800" d:DesignHeight="450"
             x:Class="ScrollingLabel.Views.CustomerListView"
             xmlns:vm="clr-namespace:ScrollingLabel.ViewModels;assembly=ScrollingLabel.Core"
             xmlns:rxui="http://reactiveui.net"
             x:TypeArguments="vm:ICustomerListViewModel"
             xmlns:designVM="clr-namespace:ScrollingLabel.Design.ViewModels;assembly=ScrollingLabel.Design"
             x:DataType="vm:ICustomerListViewModel"
              x:CompileBindings="True"
>
  <Design.DataContext>
    <designVM:CustomerListViewModelDesign/>
  </Design.DataContext>
  <Grid>
    <ScrollViewer x:Name="CustomersScrollViewer" AllowAutoHide="False">
      <ItemsControl x:Name="CustomersListControl" Items="{Binding Customers}" Margin="0,0,20,0">
        <ItemsControl.ItemTemplate>
          <DataTemplate>
            <rxui:ViewModelViewHost ViewModel="{Binding}"  HorizontalContentAlignment="Stretch"/>
          </DataTemplate>
        </ItemsControl.ItemTemplate>
      </ItemsControl>
    </ScrollViewer>
  </Grid>
</rxui:ReactiveUserControl>
Because the scroll viewer in avalonia puts the scrollbar on top of the content, I have had to add a margin to the items control. Additionally, I have added AllowAutoHide=”False” to the scroll viewer.
Now for the code behind. Looking at the pertinent customer view initialization code:
            CustomerName = this.FindControl<TextBlock>("CustomerName");

            this.WhenActivated(d =>
            {
                this.WhenAnyValue(x => x.ViewModel)
                    .BindTo(this, x => x.DataContext)
                    .DisposeWith(d);

                CustomerName.Margin = CustomerNameMargin(DefaultTopMargin());

                MessageBus.Current.Listen<ScrollViewValues>()
                .Select(scrollViewValues => CalculateCustomerNameMargin(scrollViewValues))
                .Select(topMargin => CustomerNameMargin(topMargin))
                .BindTo(this, x => x.CustomerName.Margin)
                .DisposeWith(d);

            });
Unlike WPF, we don’t have automatic declarations of the controls. Thus the reason for the FindControl<>() call. Now let at the rest of the code that supports the above:
private Thickness CustomerNameMargin(double topMargin)
        {
            return new Thickness(CustomerName.Margin.Left, topMargin, CustomerName.Margin.Right, CustomerName.Margin.Bottom);
        }

        //private double Actual

        const double _verticalPadding = 8.0;
        const double _bottomBuffer = 10.0;
        private double CalculateCustomerNameMargin(ScrollViewValues scrollViewValues)
        {
            var newMargin = DefaultTopMargin();

            if (scrollViewValues.ReferenceParent != null)
            {
                try
                {

                    var topOfCustomerBoxInParentControl = this.TranslatePoint(new Point(0, 0), scrollViewValues.ReferenceParent)?.Y;

                    if ((topOfCustomerBoxInParentControl + newMargin) < (scrollViewValues.ScrollVerticalOffset + _verticalPadding))
                        newMargin = (scrollViewValues.ReferenceParent.TranslatePoint(new Point(0, scrollViewValues.ScrollVerticalOffset + _verticalPadding),this)?.Y).GetValueOrDefault();

                    //what if our calculated margin is below the bottom of the viewport
                    var bottomExtent = scrollViewValues.ScrollVerticalOffset + scrollViewValues.ViewPortHeight;
                    if ((topOfCustomerBoxInParentControl + newMargin) > (bottomExtent - CustomerName.Bounds.Height - _bottomBuffer))
                        newMargin =
                            (scrollViewValues.ReferenceParent.TranslatePoint(new Point(0, (bottomExtent - CustomerName.Bounds.Height - _bottomBuffer)),this)?.Y).GetValueOrDefault();


                    //don't let us roll of the end of the folder view
                    if ((newMargin) > (Bounds.Height - CustomerName.Bounds.Height - _bottomBuffer))
                        newMargin = Bounds.Height - CustomerName.Bounds.Height - _bottomBuffer;

                    if (newMargin < _verticalPadding)
                        newMargin = _verticalPadding;
                }
                catch
                {

                }
            }

            return newMargin;
        }

        private double DefaultTopMargin()
        {
            return (Bounds.Height - CustomerName.Bounds.Height) / 2;
        }
You will notice the algorithm is exactly the same, only differences the method of translating the point. Now to the customer list view where send the signal when the scroll view has changed. The VerticalContentOffset property and the ViewportHeight doesn’t exist. Therefore we have to replace them. But direct replacements are available.
            CustomersScrollViewer = this.FindControl<ScrollViewer>("CustomersScrollViewer");
            CustomersListControl = this.FindControl<ItemsControl>("CustomersListControl");

            this.WhenActivated(d =>
            {
                this.WhenAnyValue(x => x.ViewModel)
                 .BindTo(this, x => x.DataContext)
                 .DisposeWith(d);

                MessageBus
                 .Current
                 .RegisterMessageSource(
                    CustomersScrollViewer.WhenAnyValue(x => x.Offset.Y, x => x.Viewport.Height,
                        (cvo, vh) => new ScrollViewValues(cvo, vh, CustomersListControl))
                   );

                ViewModel?
                  .Load
                  .Execute()
                  .Subscribe()
                  .DisposeWith(d);
            });
And there you have it. See you next time.